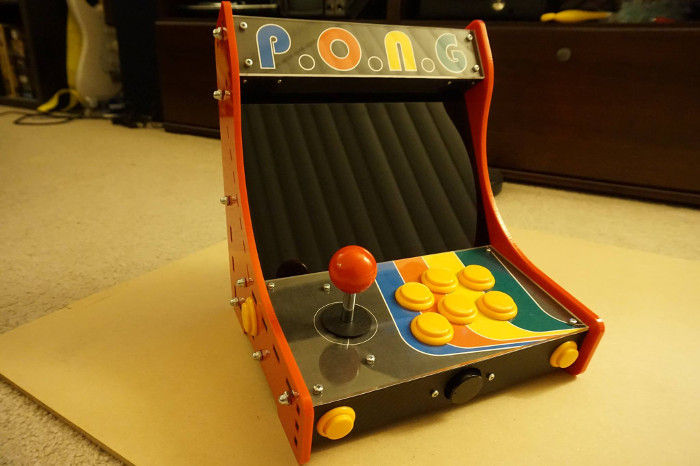
A laser-cut, Raspberry Pi powered, single player bartop arcade!
I’ve been wanting to build a MAME cabinet ever since high school. Year after year, I’ve noticed the cost of building one going down - especially with the release of the Raspberry Pi.
And with my latest introduction to the world of laser cutters, I decided a few months ago, this will be the year!
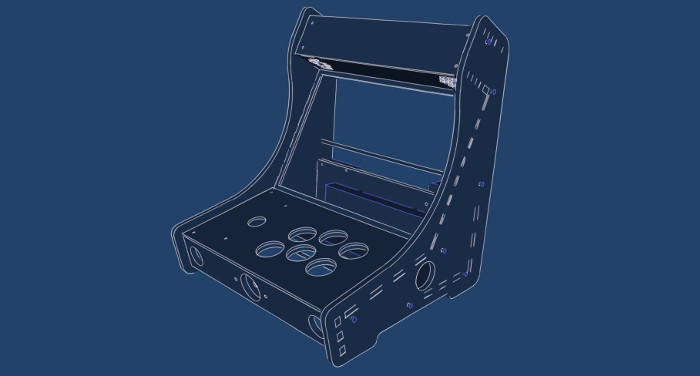
So I ordered some parts, measured them with some rules and calipers, and whip out my favorite CAD (SketchUp) and starting doodling :)
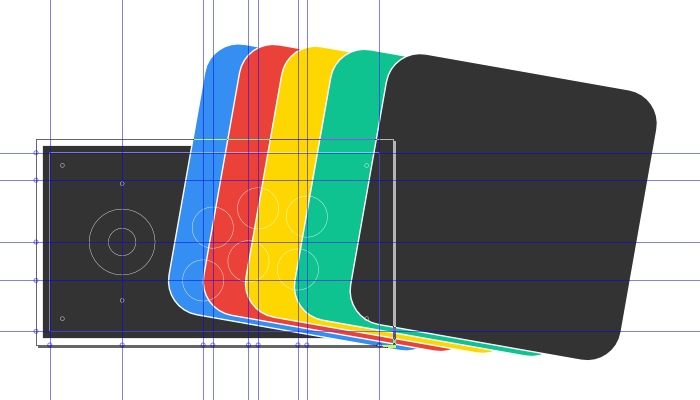
Ooo, and vector galore in Inkscape!
Parts
Most of the parts were sourced from eBay:
| Quantity | Item | Source |
|---|---|---|
| 1 | Raspberry Pi 2 Model B | |
| 1 | 16GB miniSD card | |
| 1 | 10.1” IPS LCD module with 12V HDMI controller (1280x800) | eBay |
| 1 | 1 player MAME kit (joystick, 10 buttons, USB controller) | eBay |
| 1 | Dell sound bar (AX510) | Amazon |
| 1 | 5V 3A DC-DC step-down regulator (KIS3R33S) | eBay |
| 1 | 12V DC laptop power adapter |
SD card
As always, never go too cheap! Go for well known brands AND only buy from trusted sellers. MAME is heavy on disk I/O during the initial load of games - if you care about your system being snappy, search for a card with a good read/write benchmark.
LCD module
Usually, the LCD module and the HDMI controller are sold separately but I recommend buying a combo. Trying to order a controller that can drive the LCD module you picked out can be a bit of a pain. You’ll have to message sellers to flash the proper firmware, include the right wires, etc.
FYI, I’m going with an IPS one here so that there’s a wide viewing angle (like your tablet displays). This is closer to the CRTs :)
MAME kit
There’s no official name for these things but they’re pretty popular on eBay. There’s a few different shapes and sizes. Almost all these kits will come with a USB controller which basically shows up as a generic USB game controller when you plug it in. There’s even ones with back-lights. Pick whatever you fancy!
Speakers
I scarified a brand new speaker bar from Dell. It was only $10 but it was so well designed and engineered that I felt a bit barbaric and guilty about ripping them apart :(
Power
Good voltages for this type of project is 12V and 5V. Most of the HDMI controller will require 12V. Most speakers are either 12V or 5V. Raspberry Pi will need 5V. Step-down is prefer over step-up for a variety of reasons (safety, efficiency, stability). The highest voltage we need is 12V and that’s pretty safe (too low to cause any harm) so we’ll choose that to be our input voltage from our power supply.
Power supplies come in many shapes and sizes but if you’re hooking them up to anything sensitive like digital electronics you’ll want one that is well regulated. Laptop power supplies are a great choice if you need a well regulated power source in the 9V to 20V range with a decent amount of wattage. They’re also mostly switch-mode so quite efficient. Just like the SD cards thou… be wearily of generic brands and cheap prices.
Our input is 12V but the Raspberry Pi will need 5V so we’re using a step-down voltage regulator. This one can accept 7V to 24V and 12V is comfortably in that range. The output, 3A, is more than plenty for a Pi.
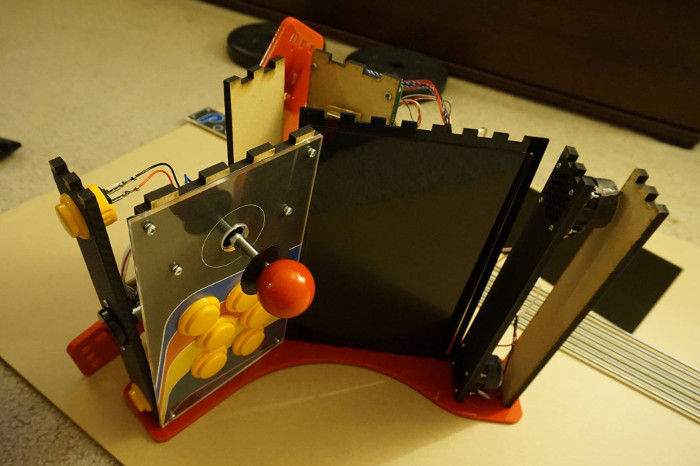
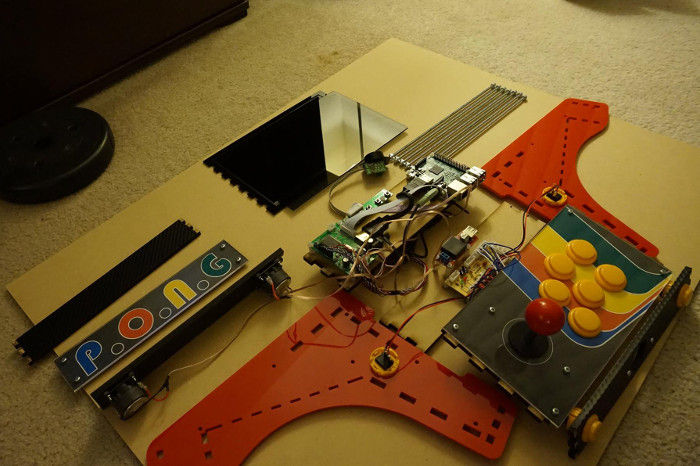
Laser cutting
The sides are cut from 5.6mm cast acrylic. The rest of the body is mainly 6.2mm MDF with a few acrylic panels that slot into the sides. The whole thing is held together by some threaded rods and nuts running.
I used my bolt cutter to cut the rods which warped the threads at the end. Tapering the ends with a rotary tool fixed it but there was quite a bit of science to it - in other words, it was painful -_-
Software
I’m using a recent SD card image from RetroPie. RetroPie is one of the many all-in-one emulation images for the Raspberry Pi. I choose this one based on recommendation rather than trying out a bunch - so your mileage may vary. You’ll want to start here.
MAME (rant)
MAME is messy. It’s not like other emulators where you can throw it any ROM and it’ll try to run it. No, MAME knows about EVERY game it supports. This is because all the ROM names are hard-code into the emulator.
The downside here is that both the emulator and the ROMs are version-ed. Some people refer to this as a romset number. For example MAME version 0.106 uses 106 romset - a fancy word for, hey makes sure all your ROMs are version 0.106 else MAME won’t load them!
Not all ROMs are changed on each update thou. So let’s say you’re running a MAME 0.106 emulator and you’ve a game that has 2 versions: a 92 romset and a 107 romset. Well you’ll need the 0.92 version in this case because up until MAME 0.107, it’s looking for the 0.92 version.
To make matters worse MAME has been forked a bunch of times. The distributions are fragmented beyond belief. RetroPie includes several forks and several versions of said forks.
For now, I’m sticking to AdvanceMAME 1.2 which is based off MAME 0.106 which means you need 106 romset. Finding them can be an art. MAME Database is helpful at looking at which versions are out there for a particular ROM. Also read up about parent ROMs!
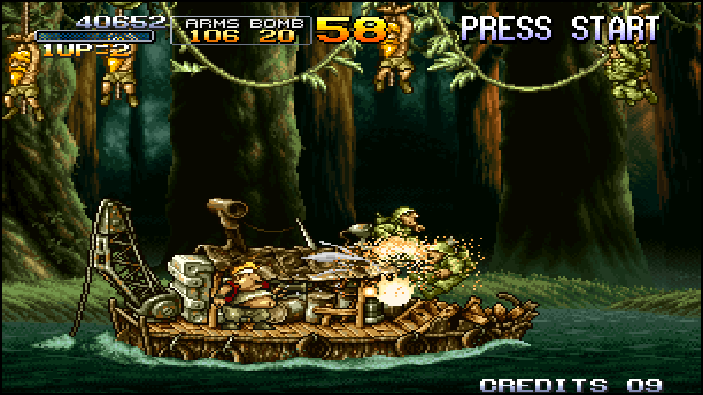
For finding older versions, it’s helpful to use a witty Google search. For example mslug.zip is the ROM name (hard-coded). If I’m looking for an old version I might search “Index of” “mslug.zip” - you’re basically looking for hosted files. If the date is in the early 2000s, then there’s a good chance it’s romset 106! You won’t know until you try it thou!
For AdvanceMAME, the TAB key is your friend! Anything changes in there will be saved. Free-play is usually set in the DIP switches, sometimes in the “service mode” but if all else fall, assign a button to “Service” or “Coin”.

Files
- CAD Drawing (SketchUp)
- Controls Artwork (Inkscape SVG)