Now that we’ve our first prototype, let’s figure out how to flash the sucker!
The MK22FN512VLH12 has 512KB of on-board flash where a program can be stored. The process of writing a program to this memory is called flash programming.
There’s several suggested ways to program the flash on the MCU. For development, the SWD or JTAG is preferred since it’s main purpose is for debugging. Troubleshooting this interface can be a bit messy though… it’s quite complex.
Thankfully, there’s an alternative interface called EzPort designed primarily for flash programming. With only a handful of commands, it’s simple and easy to implement.
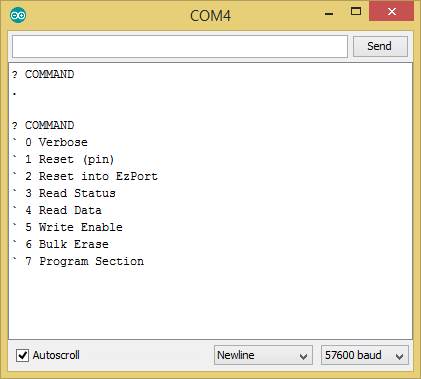
Arduino Based Programmer
Pins
The EzPort interface is accessible as a SPI slave so it’ll require 4 data lines. This is a good time to mention that this chip is NOT 5V tolerant!
| Pin | EzPort | SPI |
|---|---|---|
| PTA0 | EZP_CLK | Clock (SCLK) |
| PTA1 | EZP_DI | Slave in (MOSI) |
| PTA2 | EZP_DO | Slave out (MISO) |
| PTA4 | EZP_CS_b | Chip select (SS) |
Section 30.2.1 states the maximum EZP_CLK frequency as a factor of the system clock. Not sure what the default system clock is… I choose 1 kHz:
const SPISettings ezp_spi_settings(1000, MSBFIRST, SPI_MODE0);
Commands
| Command | Code | Address Bytes | Data Bytes |
|---|---|---|---|
| Read Status Register | 0x05 | - | 1 |
| Write Enable | 0x06 | - | - |
| Flash Bulk Erase | 0xC7 | - | - |
| Flash Section Program | 0x02 | 3 | 4 to section size |
Each command is a single SPI transfer. After starting the transfer, the SPI host must send the command code (1 byte) and if any, 3 address bytes - followed by any data bytes.
For example, to read the status register:
  digitalWrite(EZP_CS_PIN, LOW);    // delay(1);
  SPI.transfer(EZP_CMD_RDSR);
  value = SPI.transfer(0);
  digitalWrite(EZP_CS_PIN, HIGH);   // delay(1);
Flash Configuration Fields
… or how not to brick your first prototype :P
Section 29.3.1 documents 16 consecutive bytes starting at 0x00000400 which can be used to protect the flash’s content. The default values are:
0x0400:   FF FF FF FF FF FF FF FF     // backdoor comparsion key
0x0408:   FF FF FF FF                 // flash protection bytes
0x040F:   FE                          // reserved
0x040E:   FF                          // reserved
0x040D:   FF                          // flash option byte
0x040C:   FF                          // flash security byte
WARNING: Until you fully understand these fields you should make sure the MCU is never reset with anything but the default programmed to these bytes.
Don’t be like a certain someone who decided to flash the entire 512KB with 10h and locked himself out :P
Walk-through
Let’s step through the process of writing a program to the flash…
Step 1: Reset into EzPort
The first step is getting the MCU into EzPort mode. In EzPort mode, the majority of the MCU is disabled - in fact, EzPort utilise the ARM core and RAM for the program section command. This allows us exclusive access to the flash memory.
To boot into EzPort mode, one must reset the MCU. Pulling down RESET_b is probably the easiest way to achieve this. While in reset, we must pull EZP_CS_b up and THEN RESET_b up. This bring the MCU out of reset and boots us into EzPort mode.
  digitalWrite(RESET_b_PIN, LOW);
  digitalWrite(EZP_CS_PIN, LOW);    // delay(10);
  digitalWrite(RESET_b_PIN, HIGH);  // delay(10);
  digitalWrite(EZP_CS_PIN, HIGH);   // delay(10);
On boot into EzPort, WIP (bit 0) in the status register is set. You should wait (poll) until this is cleared before continuing.
Once cleared, if you haven’t modified the flash configuration fields, all the bits in the status register should be cleared.
Step 3: Bulk Erase
Before programming the flash, you must first erase it. Erasing a bit sets it to a value of 1. Programming a bit sets it to a value of 0.
WARNING: Be careful not to reprogram a 0 bit. This will cause wear and damage over time. However, re-erasing is fairly safe. So always erase before programming…
The bulk erase command erases the entire flash memory to 0x00 but before this can be done, we need to enable write:
  digitalWrite(EZP_CS_PIN, LOW);    // delay(1);
  SPI.transfer(EZP_CMD_WREN);
  digitalWrite(EZP_CS_PIN, HIGH);   // delay(1);
Verify that WEN (bit 1) is set in the status register and then issue a bulk erase:
  digitalWrite(EZP_CS_PIN, LOW);    // delay(1);
  SPI.transfer(EZP_CMD_BE);
  digitalWrite(EZP_CS_PIN, HIGH);   // delay(1);
WIP will be set while the bulk erase in progress - along with WEN. Poll until both are cleared before continuing.
Step 4: Program Sections
Now that all the bits in flash have been erased to a value of 1 we can start the programming!
In EzPort, the most efficient way to program a stream of bytes is via the program section command. After the command code byte, this command expects 3 address bytes followed by 4 or more data bytes. The data bytes must be a multiple of 4 and less than the section size.
The reference manual isn’t too clear on what the section size is but I believe it’s equal to the sector size for this MCU (2KB).
To program the entire 512KB, you’ll have to program 2KB at a time, calling this command multiple times while incrementing the address by 2KB. But thankfully, our programs are not always that beefy!
To program a section, first enable write (see last step) and then:
  digitalWrite(EZP_CS_PIN, LOW);    // delay(1);

  SPI.transfer(EZP_CMD_SP);
  SPI.transfer(addr >> 16);         // MSB first
  SPI.transfer(addr >> 8);
  SPI.transfer(addr >> 0);

  for (unsigned long i = 0; i < len; i++)
  {
    SPI.transfer(nextByte());
  }

  digitalWrite(EZP_CS_PIN, HIGH);   // delay(1);
Again, wait for the WIP and WEN bits to clear before continuing.
Now that you’ve program all the necessary bytes you might want to read them back to check for any errors. Check Section 30.3.1 for support read commands!